CLICK HERE FOR FREE BLOGGER TEMPLATES, LINK BUTTONS AND MORE! »

Saturday, December 24, 2011

Pop Up Gift Card Simply Scored with Holly Berry Bouquet Specialty Paper

Isn't this gift card holder cute?  When the holder is opened the gift card inside pops up! It's a quick and easy project with the Simply Scored Scoring Tool and Table Top Cutter.  I selected  two patterns from the Holly Berry Bouquet Specialty Paper to dress it up.  I am completely addicted to this pine cone stamp from Pines and Poinsettias.  Use the Stampin' Write markers to ink the stamp and then highlight the stamped image with Dazzling Diamonds.

Gina K. posted a video tutorial to make this Gift Card holder and I had to give it a try!  My co-worker wanted a few gift card holders, so I decided to try out Gina K.'s tutorial.


I used sticky strip to adhere the belly bands and the scored areas that form the base which holds the gift card.  The area that the gift card stands in is open the entire width, so this design will hold gift cards of varying sizes.  


The Scallop Punches make an attractive embellishment for the belly-band, but I wish I had a Very Vanilla Gel Pen.  As you know Holly Berry Bouquet uses Very Vanilla as an accent color, so I did not want to use my white gel pen to decorate my Real Red scallop.  Does anyone else feel the need for a Very Vanilla Gel Pen or do you have an alternative suggestion for embellishing the Real Red scallop? Leave a comment, if you have a solution to the Very Vanilla/scallop circle dilemma!  Happy Holidays!

Sunday, December 18, 2011

Village of Christmas Cuteness Featuring Holly Berry Bouquet DSP

Hello!  Remember us, Craft Haven Retreats?  This year has passed in the blink of an eye for Nanci and I.  We haven't posted since March!  My camera decided to stop working and I did not replace it until Black Friday!  Lake View Lodge kept us pretty busy this spring and summer.  Nanci attended the Stampin' Up! Convention in Utah this past July and I became a demonstrator later that month as well.  

We decided to hold our December Club meeting one week after our November Club, so that two hostesses from our club could take advantage of the additional hostess benefits that Stampin' Up! was offering.   While at Convention, Nanci participated in the Village of Cuteness class and she decided that our club should make a Village of Christmas Cuteness at our December meeting.


Village of  Christmas Cuteness
All our club members were thrilled with the project!  Our villages sparkle with Glimmer Paper, Mica Flakes, and Dazzling Diamonds!


Nanci downloaded this My Digital Studio stamp image from Welcome Christmas and sized it to fit the project!


We love the dimension that the wood sheet layers give this door.  


We will all enjoy our Village of Christmas Cuteness for years to come.  One of our club members suggested that we could add to it each year by adding a church, stores, or additional homes.  We hope this post will inspire you to start your own Village of Christmas Cuteness!  Nanci and I wish you, your family and friends a safe holiday season and a happy new year!

Friday, March 4, 2011

Stamp Club Road Trip!

Nanci and I had planned an overnight special at Lake View Lodge for February 19th.  Several members of Nanci's Stamp Club signed up, so we decided to have the February Club meeting at Lake View Lodge!  We had a blast!  We had planned to make this delicious cupcake card, but we forgot the Create a Cupcake stamp set!   
 
 What do you do when you are 125 miles from your sentiment?  You improvise! 
 
 Terry, the newest member of the Stamp Club, is modeling the re-design  with an extra cherry on her cheek!  We love the Red Glimmer paper--it makes the cherries on the cupcakes sparkle!  The Elegant Lines embossing folder really adds depth and swirl to the cupcake icing!  Nanci and I went to a Stampin' event at Carol Nee's home and she actually had the cutest cupcake stand and cupcakes that looked just like the one's on Nanci's card!  They were delicious too!

From cupcakes, we switched over to Ice Cream Parlor DSP from the sale-a-bration catalog!
The colors of this DSP are fun and fresh.  The Sew Suite stamp set is great!  I wish they had done sentiments to go with them!  Nanci and I want to suggest; Sew nice to meet you, Sew Sweet, Miss you sew much.  The possibilities are endless!  Share your sentiment ideas with us--leave us a comment at the end of this post!
 Puns from the Past stamp set does include--sew glad we're friends--I recently purchased that stamp set just because it had that sentiment in it! :)
 
The Sweet Stiches DSP paper and Pattern Pieces stamp are great too!  We used the coordinating fabric and buttons with a little bit of crochet trim to embellish our card.  Another great card using Sweet Stiches DSP and Designer Fabric! 
 Once we finished our club projects, we jumped right into full throttle crafting mode!  Michelle and Jessice were swapping pictures and the stories behind them!
 Have you ever made a diaper cake for a baby shower?  Becky's turned out so cute!
  Making sure that the stamp is inked thoroughly!
 Terry's very first scrapbook page!
A whole lot of scrapbooking is going on!
 Chris made her first Squash Book and has plans for a second one already!
These ladies are serious crafters!  Almost everyone was crafting until 2:30 AM, but I heard the first person head back to the craft room around 7:30 AM! 
 Jessica took several photos of our group before everyone left Sunday afternoon!  These two are my favorites. 

Which do you prefer the black and white or the color photo?  Please e-mail us at info@crafthavenretreats.com, if you would like to bring your group to Lake View Lodge for a crafting retreat!  We are running a Crazy 8 Special right now.  Bring your group of eight crafters and we will give you an additional $200 off our Spring 2011 Special of $199 per person!  Happy crafting!

Friday, February 11, 2011

Afternoon Delight!


We had a great card class on Wednesday.  Fourteen novice card makers attended our Beginner's Valentine class!  We made the three cards from our post, Be My Valentine on Monday.    Isn't this room perfect for crafting? 


We used Stampin' Up! glue sticks and Dimensionals for our adhesives with great success.  Everyone agreed that the Red Glitter Paper is fantastic!


A little concentration, smiles, and laughter made the afternoon fly by!


This lively group of neighbors were eager to learn about card making!  We had so many great questions!


Applying light even pressure after careful placement of the background layer.


All the participants loved the cards they made!  They stamped the backs of their cards with the Handmade By stamp from the Occaisions Mini catalog.  They also stamped their envelopes with coordinating stamps from the XOXO Stamp set.  We will be returning in April to make Easter/Spring cards!

Wednesday, February 9, 2011

Punch Art Montage!


Believe it or not . . . Nanci's daughter painted her room Basic Gray with Black, White, and Melon Mambo accents!  So Nanci created this montage of punch art to hang on her wall.  Yes, with the exception of the Melon Mambo button all the decorations were punched or cut with an embosslit die!


Here is a picture of the 12" X 12" page before it was framed!


This project is fast, fun, and fabulous!  Happy crafting! 

Monday, February 7, 2011

Be My Valentine!

I'm doing a Valentine's card class this week.  All the participants are first time card crafters, so the cards need to be fast, fun, and fabulous!  The class materials are limited to the XOXO stamp set, Real Red Ink, Whisper White, Pink Pirouette, Real Red, Basic Gray card stock, Love Impressions DSP and Red Glimmer Paper.   These are the cards I chose for the class.

Card 1

I just love the Red Glimmer Paper!  Don't you?  I stamped some Whisper White card stock with the XOXO background stamp and punched out the other two hearts!  They are mounted with dimensionals  on Basic Gray Scalloped Heart of Hearts embosslits.
Card 2
This card is cased from Lori Mueller's blog.  Lori cleared up the mystery of  where I saw this card!  Thanks Lori for sending the link to your card!  You can view Lori's card here!  I love the Pinking Heart border punch!  The Basic Gray layer of the Curly Label was cut with the Movers and Shapers Curly Label.
Card 3

This card is the only one in the set that didn't use the Red Glimmer Paper.  At the suggestion of the hostess, the Real Red and Pink Pirouette Small Heart punches were replaced by Red Glimmer Paper punches.  Unfortunately, I sent the card samples ahead, so they could be displayed without taking a picture of the card with the Red Glimmer Paper hearts!  All three cards are easy to assemble.  Vote for your favorite card in the comments!

Sunday, January 23, 2011

January Stamp Club with a Valentine Theme

Valentine's Day was the theme for our January Stamp Club.  Our cards this month feature the all new XOXO stamp set, Valentine's Defined,  and Love Impression Specialty Designer Series Paper found in the new Occasions Mini Catalog.  We also used the Love Patterns DSP and Filled With Love stamp set, along with our free Bitty Buttons from the Valentine's Day Promotion. A touch of Red Glimmer Paper completd our cards.


Paper:  Pretty in Pink, Whisper White, Love Patterns DSP
Stamps:  Valentine Defined, Filled With Love
Ink:  Pretty in Pink
Misc:  Big Shot Movers and Shapers, Pinking Heart Border punch, Heart Small punch, Full Heart punch,  Basic Pearls, misc white ribbon

Earlier this fall we discovered that the Movers and Shapers pieces can be used to add a layer to several of the stamps and punches, perfect for an extra border! 


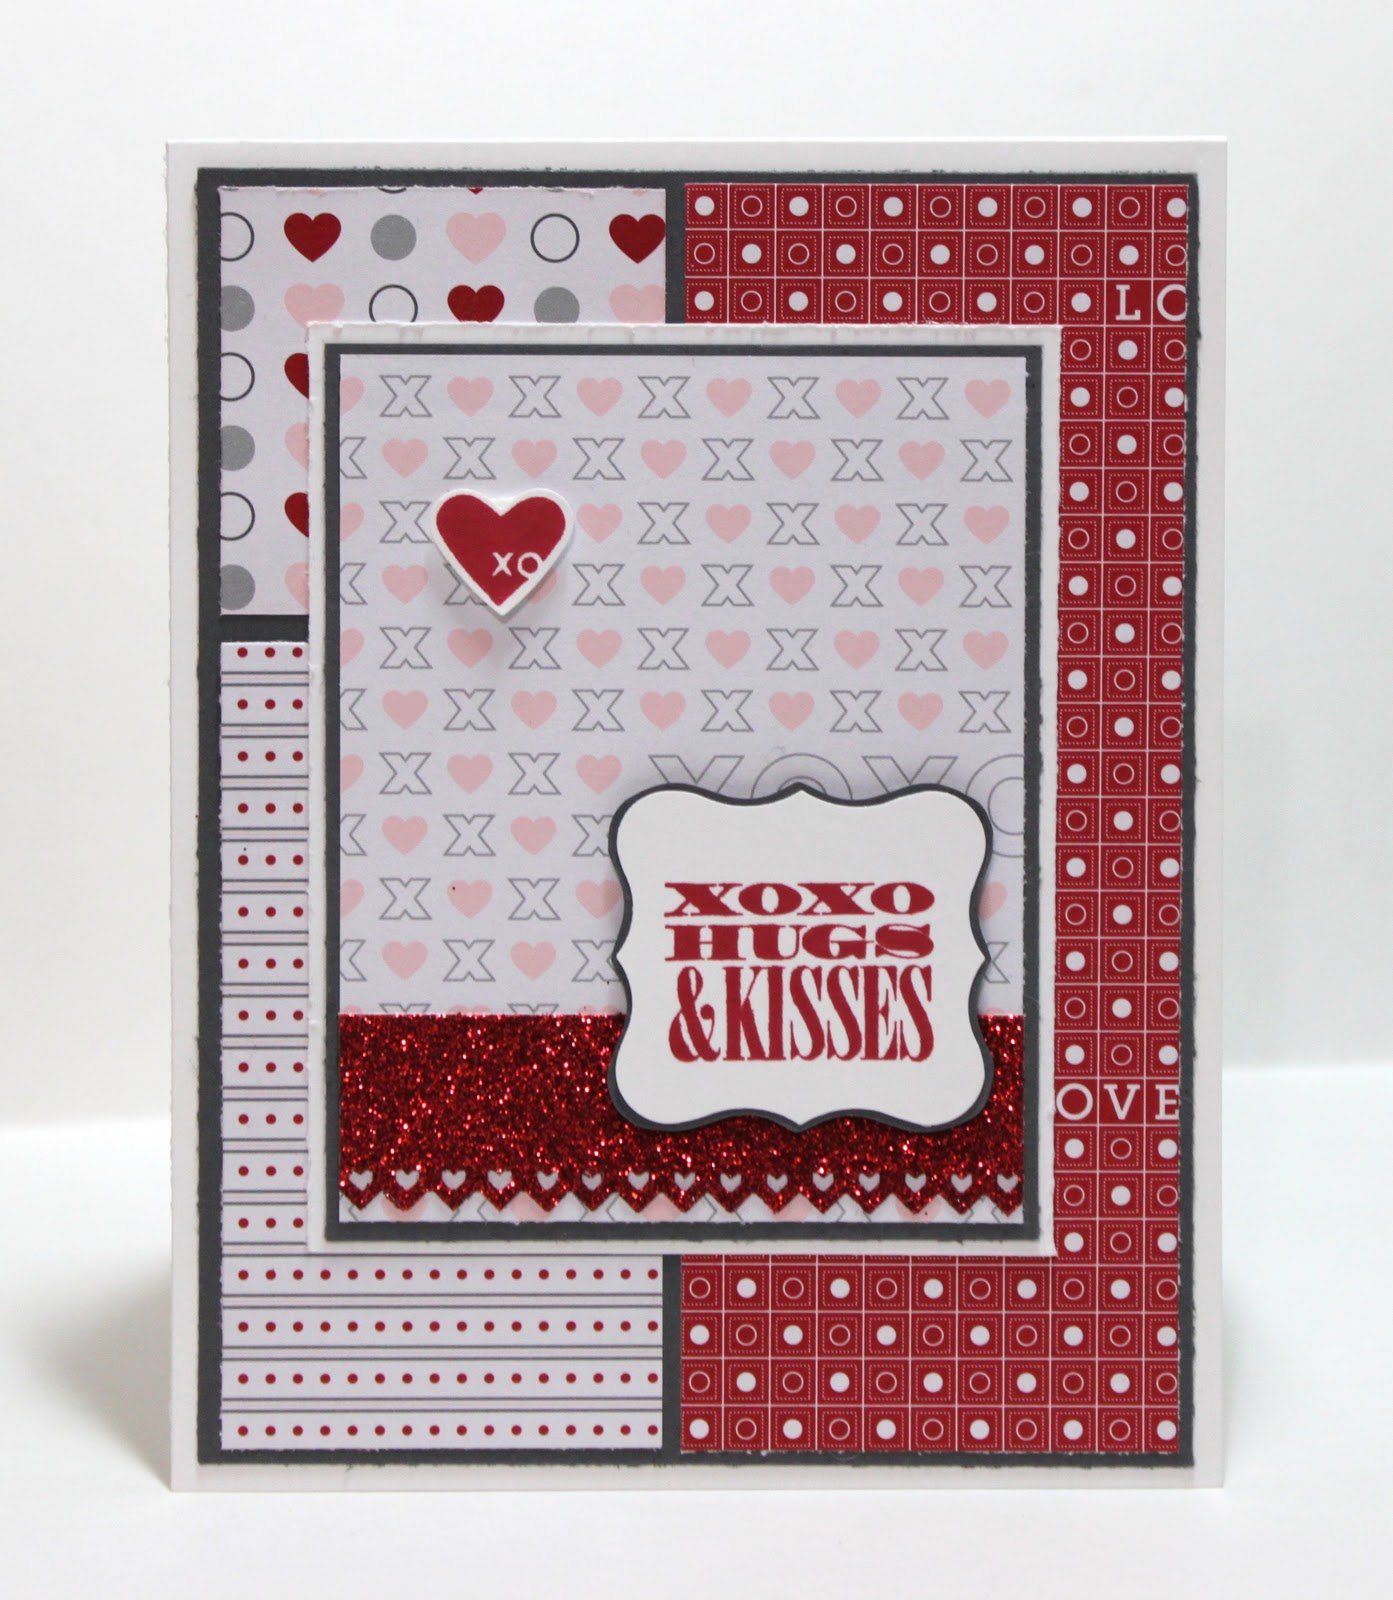
Paper:  Whisper White CS, Basic Grey CS, Real Red CS, Love Impressions DSP
Stamps:  Filled With Love, Valentine Defined
Ink:  Real Red
Misc:  Big Shot Movers and Shapers, Pinking Heart Border punch, Full Heart punch, Real Red Ribbon, Basic Rhinestones


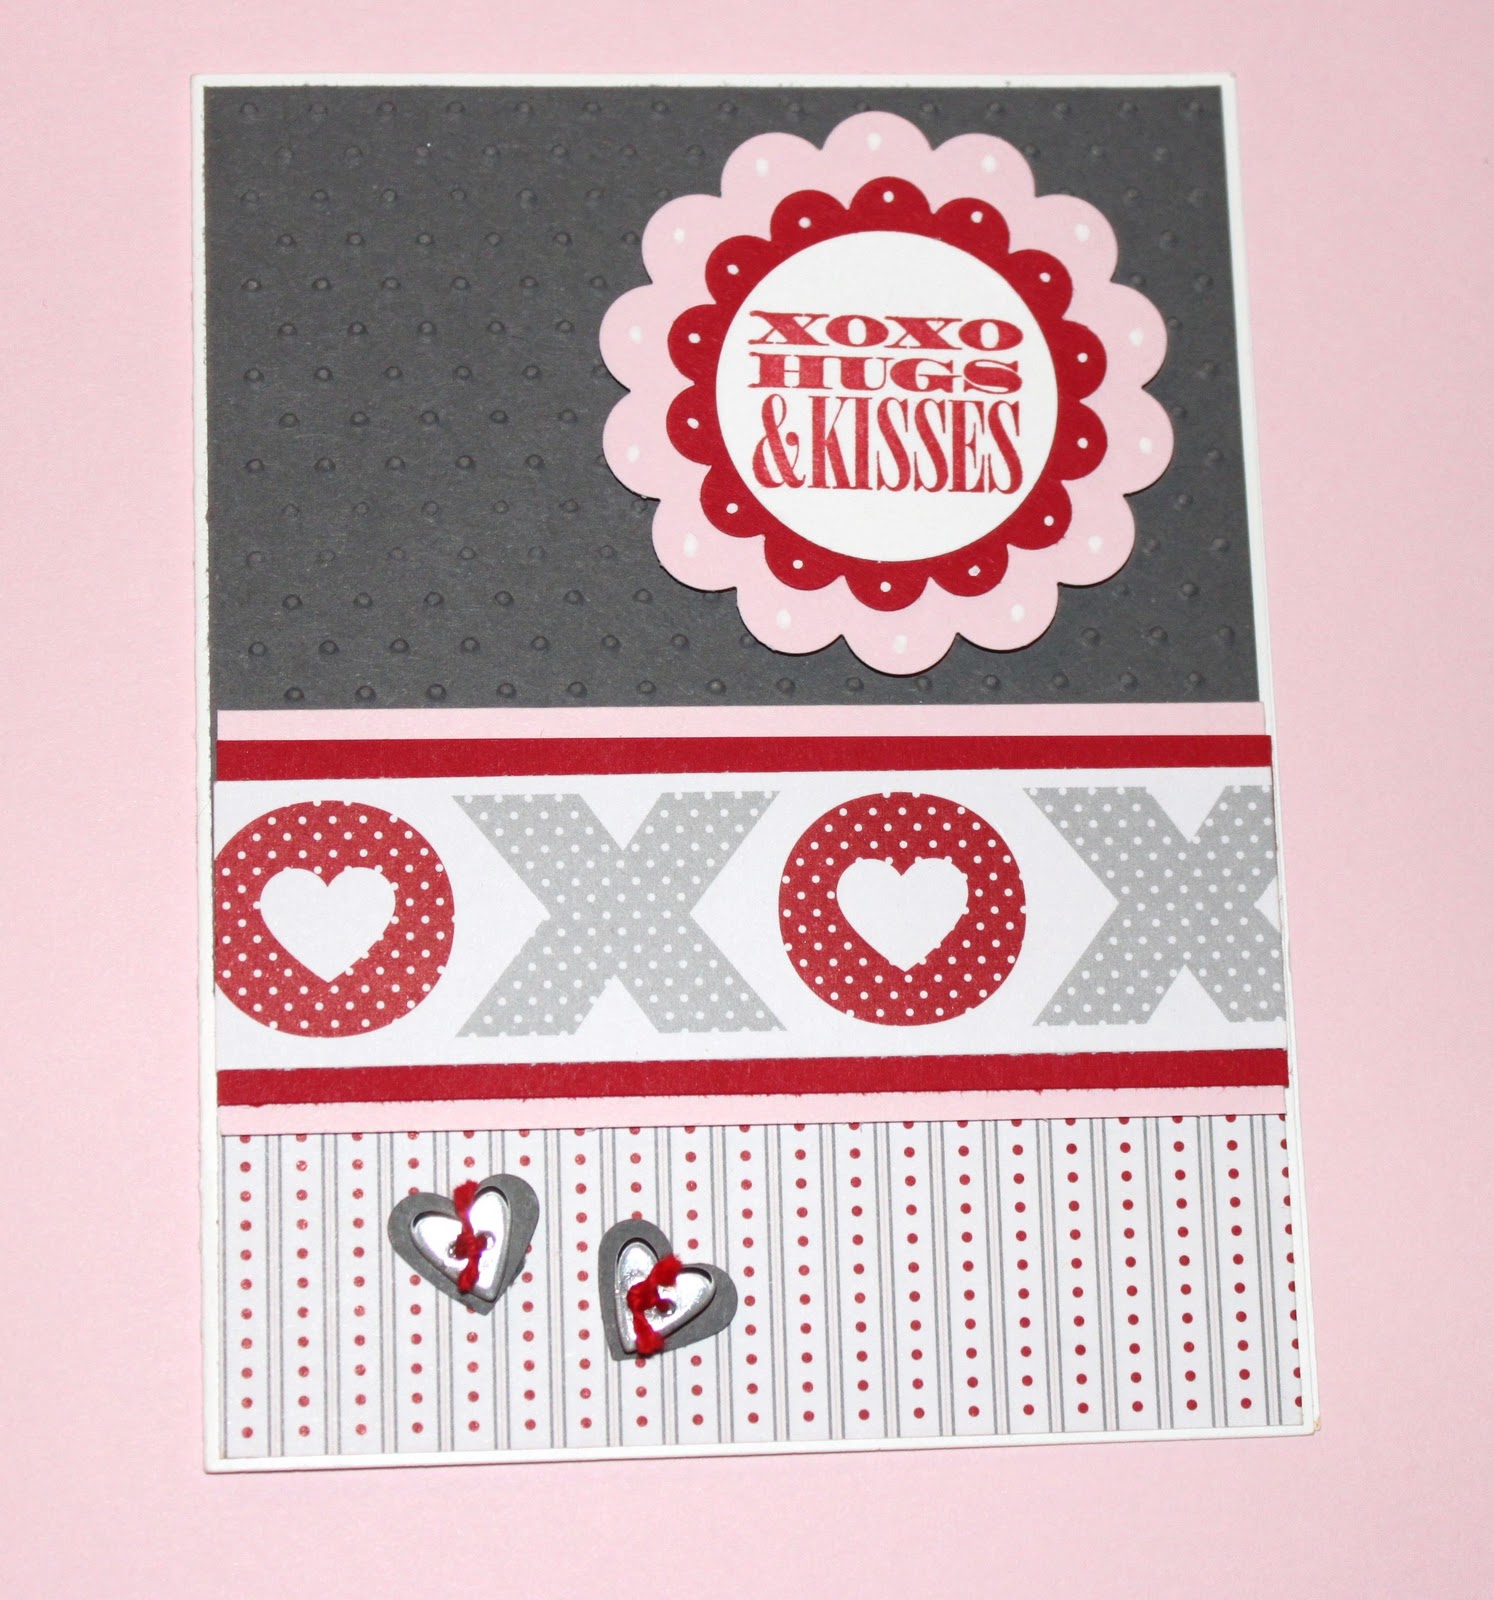
Paper:  Basic Grey CS, Real Red CS, Pink Pirouette CS, Whisper White CS,
Love Impressions DSP, Red Glimmer
Stamps:  Filled With Love
Ink:  Real Red, Basic Grey, Versa Mark
Misc:  Love Impressions Rub-Ons, 1 3/8" Oval punch, 1 3/4" Oval punch, Heart to Heart punch, Heart Small punch, Heat and Stick Powder, Pink Glitter, Real Red Seam Binding, Basic Rhinestones


Paper:  Whisper White CS, Basic Black CS, Real Red CS, Love
Impressions DSP,Red Glimmer
Stamps:  Valentine Defined, Filled With Love
Ink:  Real Red, Garden Green
Misc:  Pinking Heart Border punch, Heart Small punch, Real Red Glitter Brad, black
 ribbon, misc. flower punch


Paper:  Very Vanilla CS, Cherry Cobbler CS, Basic Black CS, Love Letter DSP, Red Glimmer
Stamps:  XOXO, Filled With Love
Ink:  Cherry Cobbler
Misc:  Scalloped Heart of Hearts Embosslit Die, Full Heart punch, Small Heart punch, 1 3/8" Oval punch, 1 3/4" Oval punch, Cherry Cobbler Seam Binding


Paper:  Real Red CS, Pretty in Pink CS, Whisper White CS, Patterns Love DSP, Red Glimmer
Stamps:  Filled With Love
Ink:  Real Red, Versa Mark
Misc:  Pinking Heart Border punch, Scalloped Heart of Hearts Embosslit Die, Perfect Polka Dots Embossing Folder, 3/4" Circle punch, Full Heart punch, Small Heart punch, Heart to Heart punch, Heat and Stick Powder, Pink Glitter


Paper:  Whisper White CS, Basic Grey CS, Pretty in Pink CS, Patterns Love DSP
Stamps:  Valentine Defined
Ink:  Pretty in Pink, White Craft
Misc:  White Embossing Powder, 1 3/8" Oval punch, 1 3/4" Oval punch, Eyelet Border punch, Curly Label punch, Basic Rhinestones, white ribbon


Paper:  Whisper White CS, Real Red CS, Pink Pirouette CS, Love Impressions DSP
Stamps:  XOXO
Ink:  Real Red
Misc:  Small Heart punch, Bitty Buttons, 1 3/8" Circle punch, Scalloped Circle punch, 2 3/8" Circle punch, White Gel pen


Saturday, January 8, 2011

Quilt Much?

My grandmother made us quilts when we were little.  I still have mine.  I enjoy quilting and have seen several quilted top note cards on different blogs and wanted to try my hand at quilting a card. 

I used DSP Patterns Stack Regals Collection and the 1 1/4" square punch to make my squares.  I adhered my squares to a piece of cardstock and then ran it through the Big Shot with the Top Note die.   I used my paper-piercing tool and mat pack to create the pattern for my stiches.  Luckily, I had some gold embroidery floss that matched the More Mustard ribbon.  I used a cross stich to add stability to the paper pieces (some of them ended up quite small) and to add more texture to the quilted layer.  The card base is Night of Navy card stock layered with More Mustard DSP Patterns Stack Regals Collection and Very Vanilla.  The senitment is from Inspired by Nature and stamped in Night of Navy Ink.  I used the cutter kit distressing tool to distress the edges of the Very Vanilla and Night of Navy layers of the sentiment.  I loved making this card.  I hope you will try this technique too!


Related Posts Plugin for WordPress, Blogger...